

As a trusted SMT Board Assembly supplier, we understand the critical role that solder masks play in the overall performance and reliability of printed circuit boards (PCBs). Applying a solder mask correctly is a meticulous process that can significantly impact the functionality and longevity of the final product. In this blog post, we'll walk you through the step-by-step process of applying a solder mask in SMT Board Assembly, sharing our industry expertise and best practices.
Understanding the Solder Mask
Before delving into the application process, it's essential to understand what a solder mask is and why it's crucial. A solder mask is a thin layer of polymer that is applied to the surface of a PCB to prevent solder from bridging between adjacent pads during the soldering process. This not only helps to avoid short circuits but also protects the copper traces on the board from oxidation and environmental damage.
Step 1: PCB Preparation
The first step in applying a solder mask is to prepare the PCB. This involves thoroughly cleaning the board to remove any dirt, grease, or oxidation that may be present on the surface. A clean surface is essential for ensuring proper adhesion of the solder mask. We typically use a combination of chemical cleaning agents and mechanical scrubbing to achieve a pristine surface.
Once the PCB is clean, it's important to inspect it for any defects or damage. Any scratches, dents, or other imperfections on the board can affect the quality of the solder mask application. If any issues are detected, they should be addressed before proceeding with the next step.
Step 2: Solder Mask Selection
Choosing the right solder mask is crucial for achieving the desired results. There are several types of solder masks available on the market, each with its own unique properties and characteristics. The most common types of solder masks include liquid photoimageable solder masks (LPSMs) and dry film solder masks (DFSMs).
LPSMs are the most widely used type of solder mask in SMT Board Assembly. They offer excellent resolution, adhesion, and chemical resistance, making them suitable for a wide range of applications. DFSMs, on the other hand, are typically used for high-volume production runs. They are easier to apply and offer faster processing times, but they may not provide the same level of resolution as LPSMs.
When selecting a solder mask, it's important to consider factors such as the type of PCB, the intended application, and the manufacturing process. Our team of experts can help you choose the right solder mask for your specific needs.
Step 3: Solder Mask Application
Once the PCB is prepared and the solder mask is selected, it's time to apply the solder mask to the board. The application process typically involves the following steps:
- Coating: The solder mask is applied to the PCB using a coating process. This can be done using a variety of methods, including screen printing, spray coating, or curtain coating. Screen printing is the most common method of applying a solder mask, as it offers excellent control over the thickness and uniformity of the coating.
- Exposure: After the solder mask is applied, it needs to be exposed to ultraviolet (UV) light to cure the polymer. This process is known as photoimaging. The PCB is placed under a UV lamp or in a UV exposure unit, and the solder mask is exposed to the light for a specific period of time. The exposure time and intensity will depend on the type of solder mask being used and the thickness of the coating.
- Development: Once the solder mask is exposed to UV light, it needs to be developed to remove the unexposed areas of the polymer. This is typically done using a developer solution, which dissolves the unexposed areas of the solder mask, leaving behind the desired pattern.
- Curing: After the solder mask is developed, it needs to be cured to fully harden the polymer. This can be done using a variety of methods, including oven baking, infrared curing, or UV curing. The curing process typically takes several hours, depending on the type of solder mask being used and the thickness of the coating.
Step 4: Inspection and Quality Control
After the solder mask is applied and cured, it's important to inspect the PCB to ensure that the solder mask has been applied correctly and that there are no defects or issues. This typically involves a visual inspection of the board, as well as a series of tests to check the adhesion, thickness, and uniformity of the solder mask.
If any defects or issues are detected during the inspection process, they should be addressed immediately. This may involve reworking the board or applying a new layer of solder mask. Our quality control team uses a variety of advanced techniques and equipment to ensure that every PCB we produce meets the highest standards of quality and reliability.
Step 5: Final Assembly
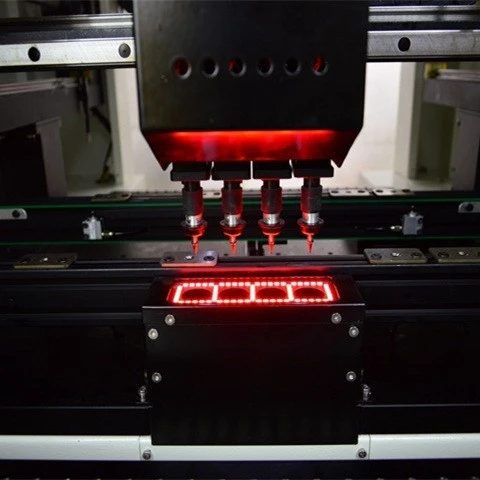
Once the solder mask has been applied and inspected, the PCB is ready for final assembly. This typically involves the placement of components on the board using SMT Surface Mount technology. The components are then soldered to the board using a reflow soldering process, which involves heating the board to a specific temperature to melt the solder and form a permanent bond between the components and the PCB.
After the components are soldered to the board, the PCB is typically tested to ensure that it functions correctly. This may involve a series of electrical tests, as well as functional tests to check the performance of the board. If any issues are detected during the testing process, they should be addressed immediately to ensure that the final product meets the customer's requirements.
Conclusion
Applying a solder mask in SMT Board Assembly is a complex and critical process that requires careful attention to detail and a high level of expertise. By following the steps outlined in this blog post and working with a trusted SMT Board Assembly supplier, you can ensure that your PCBs are of the highest quality and reliability.
If you're interested in learning more about our SMT Board Assembly services or have any questions about the solder mask application process, please don't hesitate to contact us. Our team of experts is always available to help you with your PCB manufacturing needs.

References
- IPC-A-600, Acceptability of Printed Boards
- IPC-4552A, Specification for Performance of Organic Solder Mask
- IPC-7525B, Stencil Design Guidelines


